Back to Contents
Back to Railways Page
Link to Sitemap
Back to the previous page - a philosophy/diatribe on painting...
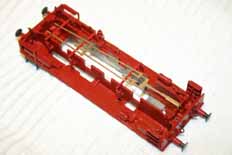
So with a small stack of parts
painted it's time to assemble them into the finished model. The first thing I set about was the chassis brakegear. The insulated side parts were assembled into the chassis (they're all friction fit) and the cross rod tubes were cut to length to fit across the nubs on the brake levers. The brake pull rod etch was clipped out of its fret and dropped on. The photo shows it assembled this far, the permanent pen marks show the position of the cross rods on the pull rods so that I can form up the pull rods off the chassis, blacken them and fit them after the rest of the chassis is assembled.
The brake cross rods and pull rods were then unclipped, allowing the chassis with wheels etc. to be fitted to the running plate. Leaving the brake levers and shoes in place after the previous stage makes life a bit easier here. The effort spent earlier to get the fit and finish in this area pays off now - there's no fiddling or bodging required to get the bits to fit; so less chance of damaging fresh paintwork.
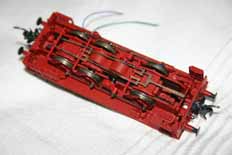
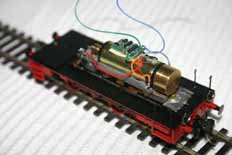
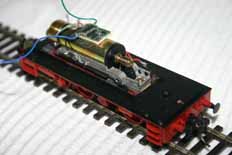
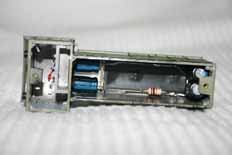
The final chassis assembly involves fitting things like couplers and the brake gear. Clipping the cross rods back in can be a bit fiddly but I can't think of a better way to do it.
In my case there's the small matter of the DCC decoder as well. This loco uses a Zimo MX62 (N-gauge decoder) with an on-board power pack to deal with dirty track. The blue and green wires will run to the power pack which you can see has been installed in the bonnet.
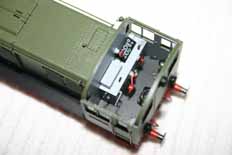
There isn't much to do to finish the body; though all of it is around the cab so the construction order needs to be carefully thought out. The pic is a bit misleading as well - the glazing was installed before the console. Some very nice, pre-cut, Cobex glazing is supplied by Weinert to fit the cab. If you haven't modified the cab side for the larger windows this becomes a very easy job. I use 'Future' (a.k.a. Johnson's 'Klear') which is actually a floor wax; a small drop on the end of a cocktail stick can be run into the glazing rebates and the pre-cut glazing material dropped in with tweezers. For the larger side windows I used some 0.5mm Cobex sheet bought from my local model shop. It's 'interesting' stuff to use as it doesn't snap off in the same way as styrene sheets and is more likely to tear and give a rough edge. But it is very clear and well worth persevering with. A laminate cutter with a hooked blade is the best thing to use to score the surface, finishing the cut with a scalpel. The pieces are best cut slightly oversize and can then be dressed individually to fit the openings, needle files are my weapon of choice. You'll want the pieces to hold themselves in place in the window openings so that you can use a brush full of Future around the edge of the window (from inside the model) which will run though the gaps by capillary action and neatly hide the edge of the glazing.
With the glazing in, the console and roof can be fitted. To prevent any chance of superglue fogging the glazing I used clear epoxy resin for these items, small drops strategically placed so that it remains invisible. The picture above will help you determine whether it's worth you detailing the interior of the cab. The cab seat is just visible mounted in the corner by the driver's side door. With the larger windows most of it can be seen...
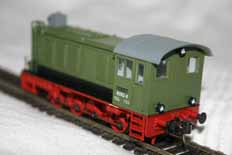
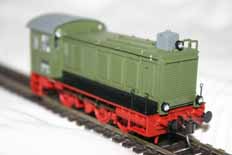
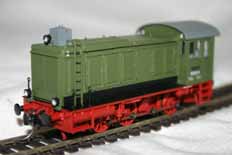
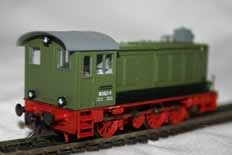
Well here we are - a completed model of a DR BR103. Not bad is it? I
think it's very easy to make an excellent model of a unique or
interesting prototype, but to make an extraordinary model of something banal,
routine or ordinary can be very difficult. This V36 is probably the
closest I've come to it; and most of that success comes down to the
quality of the kit.
It's a great loco to build as a beginner because it gets you into good
practices; whether you're building it using adhesives or solders. The
chassis doesn't need any involved assembly and runs very well straight
out of the box.
So what are the good practices? Checking fit and finish of the parts
at regular stages through the build helps ensure confidence as the loco
comes together, particularly in the case of this kit where the fit is
actually very good. The keeper plate is an unfortunate aberration in
terms of fit, but the problem is easily found and solved; even easier now
you know about it!
There's also the importance of building the sub assemblies square,
straight and parallel. The human eye is acutely discerning of verticals
and horizontals, get them wrong and a model will always shout "model!" no
matter how good the photographer (or your imagination!).
It's also worth bearing in mind that there are some assemblies and
dimensions of kits that are critical - in the case of this kit most of
those are already assembled. Some aren't critical; body-chassis fixing
screw holes fall into that category and I had to adjust them all to get a
perfect fit. Normal, safe practise.
The quality of the materials is very high, the whitemetal cleans up
nicely and takes solder and adhesives well, true also for the brass parts.
There's commendably little flash, few visible partlines and all the
parts are correctly in register. The quality of the patternmaking is very
good; accurate and simple assembly is the result. Despite this you'll
learn something of what's required to prepare castings. A glued model
will probably be marginally more fragile than a soldered one, watch the
cab steps and other surface mounted details.
For the veteran modeller there are some details you may want to change
to represent a specific prototype; my model of '022 is a case in point
with it's new cab side windows, front lamp brackets and other, minor,
observed detail differences. Of course as a beginner you don't have to
do all these jobs, assembling the kit from the box will give you an
accurate and well-running model. And it'll allow you to find out in a
controlled environment what model loco kit building is about. At the end
of the day you will end up with a running model. It's just up to you
how good it looks!
Whether an expert or someone new to the joys of kit building this is a
lovely kit to build of a widely-travelled and long-lived prototype and
I can't say fairer than that. Thoroughly recommended.
For those who, after reading my diatribe on the subject, are still
interested in building one of these models, the full selection of V36 kits
from Weinert is shown below with specifications and part numbers. The
full kits and the optional extra details mentioned in the text can be
ordered from Three Point Five. More details can be found on the links page. It also worth pointing out that this isn't the only loco kit Weinert do that comes with an assembled chassis...
| Kits with Bühler motors |
Kits with Faulhaber motors |
| DB, RP 25 wheels, 0022 |
DB, RP 25 wheels, 0024 |
| DB, NEM wheels, 4060 |
DB, NEM wheels, 0023 |
| DRG, RP 25 wheels, 0025 |
DRG, RP 25 wheels, 0027 |
| DRG, NEM wheels, 4061 |
DRG, NEM wheels, 0026 |
| DB cupola cab, RP 25 wheels, 0065 |
DB cupola cab, RP 25 wheels, 0067 |
| DB cupola cab, NEM wheels, 4076 |
DB cupola cab, NEM wheels, 0066 |
| |
DB Steinbeck cab, RP 25 wheels, 4233 |
| |
DB Steinbeck cab, NEM wheels, 4232 |
| |
DR, RP 25 wheels, 4235 (the subject of this article) |
| |
DR, NEM wheels, 4234 |
Note that all DB kits come with flat bonnet side doors, the DR and DRG kits come with louvred side doors. So if you want a DB loco with louvres you're probably better off ordering one of the DRG kits...
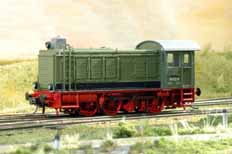
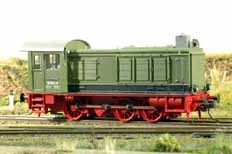
For that final piece of inspiration, two shots of 103 022-0 in use on Dave's layout Selbstgefällig :-)


