
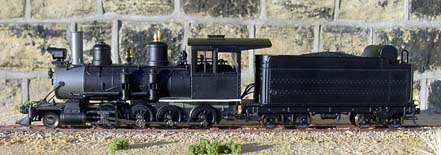
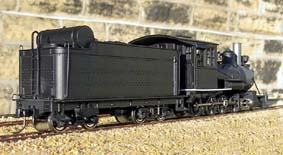
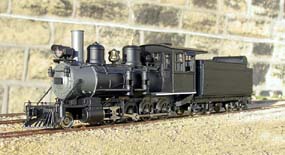
With the Precision Scale parts in my grubby mitts, attention turned to the model and the four photographs above show it as purchased.
The original donor model for this detailing project was the Broadway Limited Imports On30 C16 languishing within my collection in danger of turning itself into a white object with four legs and a trunk.
It was after finishing several HO scale detailing projects I found myself idly perusing the telephone directory of the Precision Scale O scale steam locomotive parts catalogue. I noted the detail parts required to backdate the model (as it has modern domes) to represent number 278 of the D&RGW as she was running during the 1935 - 1950 timeframe. All that was left to do was search the internet for several photographs, post the order to Precision Scale, sit back, wait and contemplate how I was going to metamorphose this white object into another.


With the Precision Scale parts in my grubby mitts, attention turned to the
model and the four photographs above show it as purchased.
The body was separated from the chassis and the cab unclipped from the former. Both were set aside to be dealt with later. With the body and scalpel in my hand (no turning back now) I proceeded to remove the moulded detail as carefully as I could. One of the slight problems I usually encounter during this stage is the imperfect finish that is left. However, never despairing I carefully sanded the body and the end result leaves the impression that the boiler appears slightly dented having seen better days.
Removal of the major boiler fittings e.g. chimney, domes etc is usually easy as they can be pulled off with my fingers. The boiler stays and smokebox numberplate were set aside as they will be required in the latter stages. In my case the domes proved to be rather stubborn and I finally resorted to brushing superglue debonder around the joints and leaving this for several minutes to allow the glue to soften. The result was that the remaining fittings were pulled off with my fingers. The denuded body was then washed in detergent to remove all traces of the superglue debonder. When dry any small holes were filled with Revell plastic model filler and sanded to the boiler profile. This and the following stage were not photographed as they broadly similar to those which appear during the modification of my Bachmann On30 Baldwin mogul.
The new boiler, smokebox and running plate fittings namely; chimney, sand dome, steam dome, tool box, turbo generator, check valves, equalisation tank, Westinghouse air pumps, air tank, pilot, bell, safety valve and whistle were cleaned up and attached to the boiler using superglue. As a test of my sanity I formed the air and steam lines from brass wire. Next time I'll be using Steph's technique and form these from copper wire as it is easier to manipulate by not being so springy. I fitted my brass efforts to the model and soldered these to the boiler fittings where I could. Both the Precision Scale catalogue and the Locomotive Cyclopaedia (published by Kalmbach) proved invaluable at this stage as they contain diagrams of the Westinghouse Air Brake system. The headlight was soldered to the headlight stand and a hole drilled through the bottom. A short length of brass tube was inserted to enable a small light bulb to be installed. The headlight assembly was fitted and at this juncture I scratchbuilt a step which was fitted to the left hand side of the smokebox along with the handrail. This enables the crew to reach the headlight. Alan Gibson 'O' scale handrail knobs were then fitted together with new handrails. Injector pipes were also made up and installed underneath the cab taking care not to interfere with the body/chassis fixings.
Turning to the tender, the only items replaced here were the air tank and air lines with the addition of Kadee #803 On30 couplers and air hoses. The piece de resistance remains hidden inside the tender body and details of the installation of the Zimo MX64 decoder and on-board power pack can be found here. Crushed charcoal was added to the tender to simulate coal.
Onto the cab. The window frames and door were painted red and I formed new handrails to follow the prototype and made door handles from brass wire, bent and filed on one leg to create the flat appearance. Glazing was cut from a sheet of glazing material and installed using Johnsons Klear.
Homeward bound, the body, cab and tender were laid aside to make way for the chassis which fortunately did not require too much work. The wheels and valve gear were removed to avoid receiving any damage whilst I cut off the moulded brake cylinders. These were replaced with Precision Scale brass versions together with the drifting valves on the cylinders. The wheels were re-installed and I took this opportunity to replace the stiff hornblock springs with lighter springs from my supply. I have a packet each of wimpy, light and medium strength springs from NorthWest Short Line which are useful for springing hornblocks. The replacement of the springs enables all of the locomotives wheels to ride on the track including the blind drivers i.e. the ones without flanges. One word of caution here if the hornblock springs are replaced. Even though the blind driving wheels are coned on the rear I have noticed that the locomotive will derail on curves less than 1 metre (3 feet 3 inches). Fortunately, the minimum radius of the curves on my layout is 1.5 metres (5 feet). The hornblock spring substitution then altered the balance of the locomotive and to rectify this I utilised a leaf spring that was left over from an earlier locomotive conversion. This was fitted to pony truck mounting to force some of the weight to the rear driving wheels. This was further enhanced by installing three layers of lead sheet in the cab roof. A fall plate was made from etched brass and fitted to the chassis and the decoder wires were taken from underneath the tender to just below the fall plate which conveniently hides these. The six visible wires were painted black and these simulate the loco/tender water and air line connections.
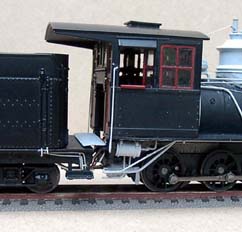
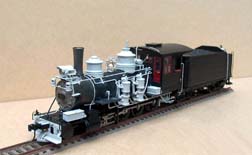
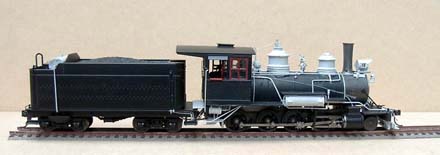
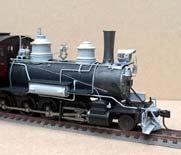
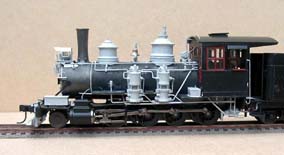
The photographs here show the installed detail parts painted etch primer grey prior
to receiving the final paint scheme - Polly Scale engine black.
The completed body, cab, chassis and tender were assembled. The end of this exercise, no. After programming the decoder and trail running of the locomotive I was not satisfied with the performance at low speed. Despite my attempts to correct this using the decoder variables the motor kept cogging at low speed and I was left with one option - remotoring. So off came the body....
I took out the original motor and carefully removed the worm for use on the replacement motor. From my supply I used a Mashima 1833 motor with two flywheels and the original worm removed earlier. The new motor was wired up and the locomotive retested and I could not believe my own eyes. The running significantly improved.
The next and (hopefully by now) the final stage was to weather the model. Prior to this I applied a coat of Testors Dullcote and let this harden off for a week. Following my previous experiments I decided to weather the model using artists oil paints and cellulose thinners. Washes using a mixture of Black, Titanium White, Burnt Umber, Raw Umber, Burnt Sienna and Raw Sienna were applied over a period of a few weeks to achieve the desired effect. One thing I have noticed using oil paints it that they leave a slight sheen to the surfaces which I feel looks very realistic. The locomotive runs in this state at present and decals will be purchased at a later date complete the model.
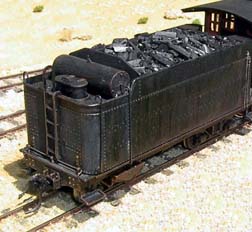
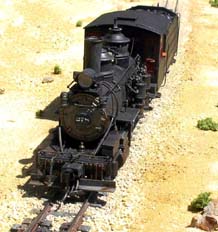
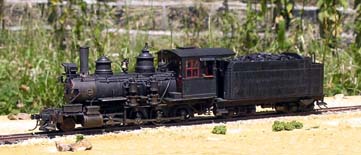
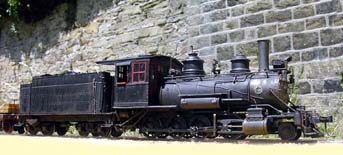
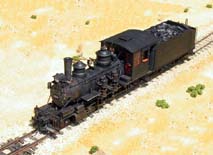
In conclusion, this is one of the most satisfying, albeit expensive, detailing
exercises I have undertaken mainly due the larger scale and that the parts can be
easily handled and seen. So there we have it - from white elephant to swan.