Back to Contents
Back to Railways Page
Link to Sitemap
Back to the introduction and re-motoring of the ÖBB 2048
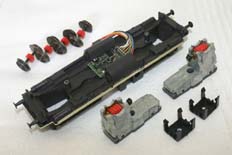
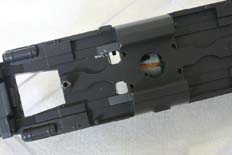
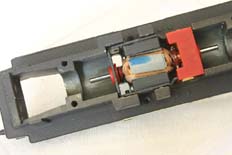
DCC time! I know I've already used the first picture to illustrate how a decoder can be made to fit under the fuel tank. I realised that providing a way for the wiring to reach the circuit board was quite important - otherwise the whole wiring loom would need replacing. There are some useful voids within the motor which would allow wires to pass through, of course with the Mashima fitted it's equally simple as the wires pass through the same holes in the chassis and then around the motor rather than through it!
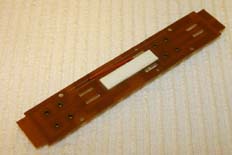
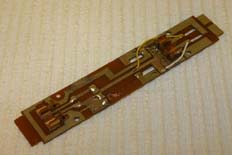
For good DCC operation, retaining the use of the lights and motor contacts there are some modifications required to the circuit board. For a start the capacitor and wound chokes in the motor circuit aren't required as all the necessary conditioning (suppression) is effectively handled by the decoder. Removing the capacitor from a DCC-equipped loco isn't a bad idea anyway as they can affect the performance of any back-EMF control. The other modification saw me remove the diodes and alter the circuiting for the lights. This allowed me to use one side of the chassis to act as the return for the lighting circuit.
It's then a relatively simple proposition to connect up the red and black wires to the bogie pick-ups, the red and grey to the motor contacts and the yellow and white to the lighting. Remember that the white (forward lighting) wire powers the front headlight (white bulb) and the rear tail light (red bulb). And t'other way round for the yellow wire. The other wires aren't required as the other functions aren't used and the blue is made redundant by the chassis return for the lighting.
The chassis return for the lighting will help reduce the bulb intensity. Don't forget that in addition either the bulbs need to be replaced with 20v versions, or the lighting CVs will need dimming. Otherwise it's bye bye bulbs...
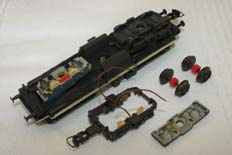
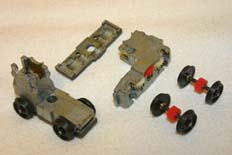
Re-wheeling isn't all that difficult either. This loco is now running around merrily on a set of Black Beetle 10.5mm diameter RP25-88 wheels. For this example I used Gibson 10.5mm diameter 'Lowmac' wheels. Either work fine; the Gibson wheels are probably marginally easier to use as they're insulated on all wheels and easier to remove from their axles. The Black Beetle wheels I used are only insulated on one side, though I'm told that they're available double insulated for a small premium.
The bogie comes apart very easily, with two screws retaining the keeper plate on to the bottom of the bogie. Undoing the screws and removing the keeper plate allows the wheelsets to be removed and the sideframe will easily follow. Useful that as it'll allow the contacts to be tweaked if required during re-assembly.
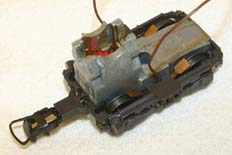
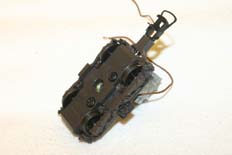
The replacement wheelsets have been disassembled and blackened (where/if required) before being re-assembled on their axles with the gears and any spacing washers fitted. The gears fitted with a comfortable push fit on either the Gibson or Black Beetle axles. If you're using wheels that are insulated on only one side make sure that the gears and washers are correctly positoned so that all the insulated wheels are on the same side of the chassis - having come this far a major short-circuit could be a little embarrassing!
Having got the wheels and gears assembled it's worth dropping them into the bogies at this stage to check that they run smoothly on the track. A wheel check gauge such as that produced by the NMRA for RP25 wheels can be very useful.
And now on to the detailing of the wee beastie...


