Back to Contents
Back to Railways Page
Link to Sitemap
Back to the previous page...
Right, lets crack on. With the chassis modifications pretty much complete and the major conversion parts prepared it's time think about assembling the loco body. And the tender too, I suppose!
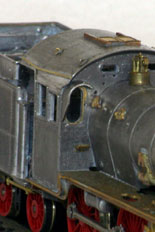
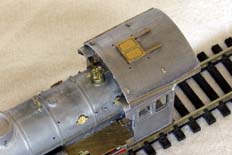
I was suprised to see that there were more modifications required to the cab area than first glances would suggest. For a start the gutters are at a different height than shown on the castings. As most DR BR38.10s, including all the ones I'm modelling, have this style of gutter I had to think about how I was going to do the gutter work reliably and repeatably. In the end it came down to removing the cast-on gutters with as much care as I could muster, to retain the surrounding detail. The new gutters are lengths of 0.45mm brass handrail wire, two pieces on each side to make the 'vee' shape crisp and simple to form. The wire was tinned with 145° solder, the wire being dragged through a rag while the solder was still liquid to leave a very thin layer of solder. They were then soldered in place with 70° solder before cleaning up the excess wire and any solder blobs. The wire can then be filed down to a thick strip.
Some of the DR P8s, including '1182, also had the standard cab roof ventilator fitted. The hatch and mesh cover are available on a fret from Weinert, the mounting for the hatch was made from 40/1000" (1mm) thick brass. Once the hatch was sweated on the whole assembly could be soldered in place. The holes for the mesh cover were pitched off from the fret; the mesh won't be fitted permanently until after painting.
And then there are the cab front windows. Which I noticed just after I'd soldered the cab front on to the boiler! So off it came again while I worked out what was going on. A quick assessment of a couple of photgraphs enabled me to work out some dimensions. Needless to say I was a little surprised when I realised that an Ex. KPEV P8 had Sachsen cab front windows... Bizarrely it's not the only Ex. KPEV loco in DR stock with Sachsen cab front windows - so has the S10 4-6-0 preserved in the Dresden Transport Museum. I think it's probably the fair handiwork of Bw Reichenbach. The new cab windows are each in two parts; firstly a 'P' shaped piece of 0.5mm thick brass to fill the existing window, secondly a piece of 0.25mm brass cut to the overall dimension of the new window. The two parts are tinned and soldered together, checking that they're in register and fit the window. They can then be soldered in with 70° solder. I then back-filled them with Chemical Metal; that way they are supported when being drilled through. The filler broke out as I was filing the wndow open to its full size, no real problem as it had served its purpose.
Thankfully the cab front work only applies to the model of '1182. Though it's not quite finished there. The glare shields need trimming on their inner edges, on the prototype it's to allow access to the washout plug so it can be removed for boiler washing. More of which anon.
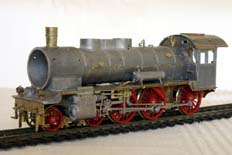
This seems like a good time to talk about the detailing of the boiler casting. As I noted on the previous page, on '1182 the running plate fittings are positioned in slightly different places than provided in the kit. it's all to clear the motion parts above the running plate. There is one job that needs doing to pretty much all post-war P8s - de-rivet the smokebox. I use a fresh curved scalpel and follow up with wet and dry to get a good finish. I removed the rivets from the smokebox door (not shown here) at the same time using files and wet and dry, a tricky job as it's a beautifully detailed lost-wax brass casting.
For the model of this particular loco there's a bit more work called for as '1182 is fitted with an early condition boiler. Which means moving the washout plugs. I filed off the original ones and fitted the new ones where required using a Weinert set of castings. On the fireman's side the mounting hole for the pump bracket needs filling; the pump will be fitted further back, on the firebox. On this loco the lubricator runs go much higher up the boiler; the original ones were filed off and replaced using a run from the Weinert fret of lubricator piping. The pump on the drivers side goes in the position shown in the kit; but there is a slot required in the bracket for the reversing rod to run through.
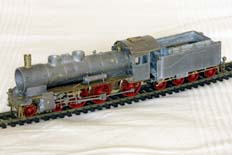
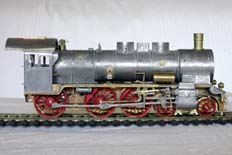
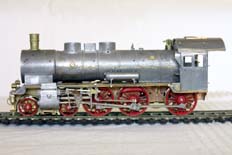
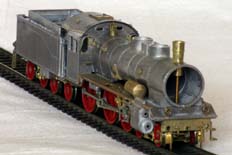
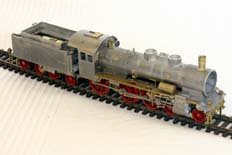
These three photos are included in this page to give some more views of all the work undertaken so far. It's worth noting at this point that all the small details in place in these views were soldered onto the individual whitemetal castings before assembly. And the running plates I made up fitted at the second attempt. Naturally there's a little filler required to finish blending in around the front of the cab, but if it's more than a pin-head sized amount I'll be surprised. At this stage, although the cab is largely assembled, the interior parts aren't fitted. Most of them won't be until after painting. I really need to get the front bogie splashers trimmed down - though I suppose I can do it when the wheels and motion next come off for blackening or painting. And I know the loco may seem a little 'nose-heavy' in some of the pictures; it's because I haven't installed the springs in the chassis yet.
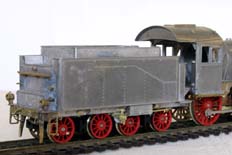
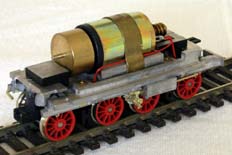
These are probably the only two shots I'll show of the tender. Other than a few details it's pretty much complete. It has been assembled largely as Weinert intended, though I did polish some rivets off the tender sides to match photos. The mechanism is supplied made up and running - contacts need to be fitted, as do the whitemetal and brass cosmetic parts. It's going to be a potent performer with that motor, traction tyres and the weight of the tender. Thankfully there's still going to be plenty of room for a DCC decoder; I'll probably use a Zimo MX62 or MX63.


