Back to Contents
Back to Railways Page
Link to Sitemap
Transfesa Ferrywagon
How to re-build the Electrotren model to the correct height.
The Transfesa Ferrywagon is now becoming more readily available in the UK as Electrotren are now part of Hornby's growing empire. It's a good model that's equally suitable for both European layouts and British HO. The problem is that it's a touch too tall for true scale. So; how to get it to the right height? In the second of the joint 'how to' pages, David and Steph show how they did it...
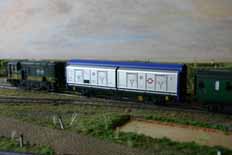
As it stands the Electrotren model is plainly too high. Remember the prototype is for service between the UK and continental Europe so it should be the same size as UK rolling stock. Shown for comparison are two well known British HO models; Roco's EE shunter and a Fleischmann Bullied coach. The size of the Electrotren vehicle is all too obvious. While doing this conversion we did discuss why the van could have been made that bit larger. With British HO still being a minority interest it appears that Electrotren have designed their vehicle to fit in better with European HO prototypes and maybe even for the 00 market.
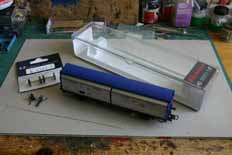
So you've got your prized new possession home, realised it's too tall and now dissapointed are wondering what you need to get the model to the right height. Well the good news is; not a lot! Most of the parts we used (Weinert wheels, Kadee couplings, Handrail wires, Coupling hooks, brake pipes etc.) are optional. A few bits of scrap plasticard might be useful though...
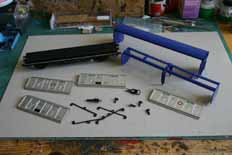
First explode your wagon. The buffer heads were pulled out (retain these for later) and then the ends of the blue moulding are pulled over the buffer shanks. The clip in the end of the bufferbeam will need cutting off later so if you get really stuck it could be removed now. After getting the top off you'll find it quite readily comes apart into its components. The chassis can be put to one side for now. We start by taking a razor saw to the body...
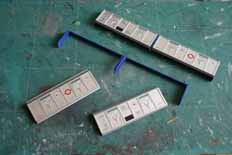
By now you'll have realised that the doors sit on an internal frame, in this case moulded in blue plastic. Start by cutting it down from the top runner with a suitable (razor)saw, cleaning up well. You'll see later that if this is completed carefully the body goes back together again very easily. The picture should make clear enough we hope! The doors can then be fixed to the frame with your favourite solvent.
Thankfully the side doors don't need any serious modification; though the runners do need removing to improve fit to the chassis and roof, the one in the bottom of the picture gives the idea. So as long as reasonable care is taken to avoid things like scuffing or gluey fingerprints the worst thing that can happen is that they get stuck on the wrong way round. It's worth checking the glued side against a good quality steel rule to make sure that it's straight in each dimension. Glueing banana-shaped sub assemblies together later on will be a bit of a nightmare.
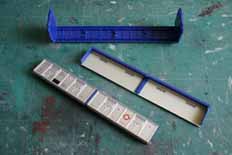
So now there are two identical sides assembled. The cleaning up of the back of each side is clearly visible in this picture; note the filing of the moulded line along the top of each side. The roof/end moulding is shown here in its unmodified state. The internal runners the length of the roof will act to align against the back of each side when it comes to re-assembly.
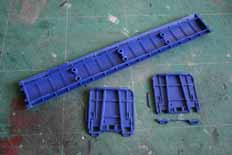
Modifying the roof and ends is the only tricky part of the job. 2mm needs removing in height overall. 1mm from between the side and roof and a further 1mm around the buffers. The two ends were cut from the roof 1mm above the top end beam on the side. With a sharp razor saw it's not too much hassle and much of the detail can be preserved. To prepare for losing the height around the buffers a small section is trimmed from the bottom of the side and the buffer hole is opened out, upwards, by 1mm.
The ends of the roof are cleaned off down to the gutter line. These sections will then sit on top of the ends forming a new, lower, assembly. So that the doors fit better under the roof the edges of the roof need trimming underneath at an angle, scraping with the side of a scalpel is ideal. Care needs to be taken not to go too far through the material - otherwise the gutter will seperate from the moulding and it's a pain to stick back neatly. Guess how we know that...?
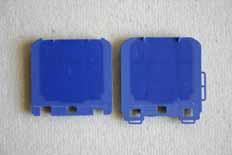
The ends shown from the back. The left hand buffer hole has been opened out to a line scribed 1mm above the existing buffer height. Also visible on that end piece is how the top has been trimmed down to the end beam leaving a small 'ear' on each side. This will help locate the roof when the side is re-assembled, as well as helping to disguise the roof/side joint when viewed from the side. At this stage the handrails were trimmed off and holes drilled for their replacement with 0.3mm hard brass wire.
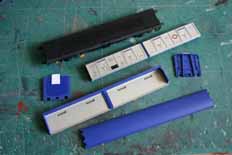
A kit of parts for a 1:87 Transfesa Ferrywagon is the result. In this view all the modified parts can be seen. The ends have been trimmed and a small reinforcing patch of plasticard has been glued behind. The roof has been cleaned up and the edges thinned. The two sides have been assembled and left to harden off. The chassis? Well at this stage the door runner has been filed away, the end clips on the bufferbeam have been cut off and the door springs trimmed back with a knife so they don't interfere with the reassembly.
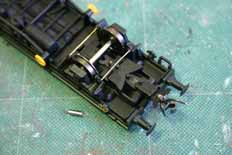
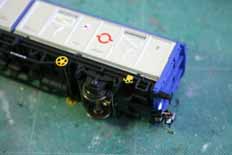
There are a couple of detail changes to the chassis, these are optional but will improve both the appearance and operation. The wheels have been replaced with a set from Weinert, these are solid machined nickel-silver to RP25 profile and are supplied pre-blackened. The brake cross rods are made from 0.45mm brass handrail wire fitted into drilled holes in the moulded brakeshoes. We use Kadee couplings for our stock and find that with the NEM coupling shaft versions (#17-#20) the performance is much improved if the coupler box is fixed on the centre-line of the vehicle. The short wire pin through the coupler arm into the chassis can be seen between the brake cross rod and axle on the centre-line of the chassis. With the 'box locked the coupler can be fitted, a #18 in this case, and the centering spring removed. Because the body will drop down over the chassis the buffer heads were glued in place in the shanks at this stage.
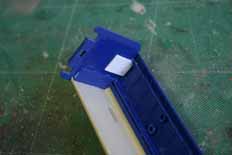
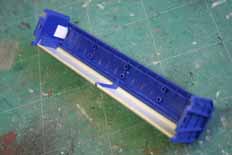
Once the parts have been made into sub-assemblies (2 sides, 2 ends, roof, chassis) it's then a case of building a wagon kit. One of the ends is fixed to the roof and a side butted up to it. The photo on the left shows how the parts are made to fit tightly together into the corner. Completing the body is simply a case of glueing the remaining end and side in place and making sure all is square.
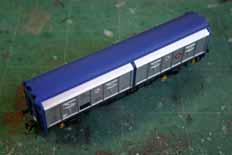
Once it's hardened off the body should then be a simple drop fit onto the chassis. We found that there was some material needed removing from the bottom of the sides so that the buffers sat neatly into their slots in the ends. It's not a particularly onerous job, but needs some care to keep the bottom of the edge straight as there isn't anything to disguise it. With the body settled on the chassis it can be glued in place with a couple of spots of solvent in strategic places. The final job is to patch the hole in the end where the body clip was. A small rectangle of plasticard cut to fit is by far the neatest method...
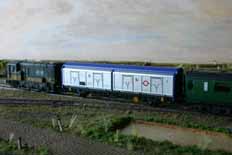
So that's it done. You can see a very worthwhile improvement in appearance compared with the 'before' view. The total job only took an afternoon, even including having to stop and clear the workbench every few minutes to take the pictures! Using a highly reactive solvent (Plasticweld) very carefully certainly helps, as does the design of the model in the first place. With the method now well defined doing this again shouldn't take more than a couple of hours.
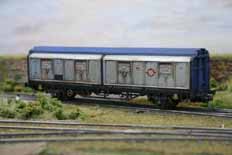
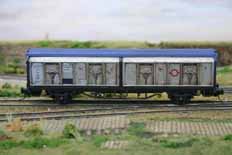
The model has been weathered, gained the grabs under the buffers, air brake hoses and a set of coupling hooks since...


