Back to Contents
Back to Railways Page
Link to Sitemap
BR62
62 015
The BR62 is a great looking loco. Like all of Wagner's later designs it has a certain elegance and 'rightness' of form. To British eyes it's outline is unreservedly alien; back tanks were never that common in the UK. The loco is effectively a small-wheeled tank loco version of the BR03 pacific, and many of the fittings are common across the two types. It was a typically ill-favoured attempt to replace a widespread and populous ex-KPEV type; the T18, later BR78. In the end only fifteen were built; the last of which survived as a steam boiler at Frankfurt-am-Oder long enough for it to gain a following and find its way into preservation. This loco, 62 015, is the subject of the model.
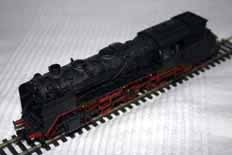
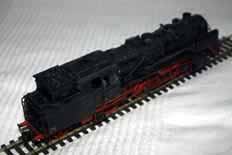
There are two ways to model the class. The Model Loco kit has a reasonable reputation, being correct in all major dimensions and caprtures the feel of the prototype well. Unfortunately it's no longer available from the factory, in part because of Bachmann's excellent version available under the Liliput name. I came across a version of the Bachmann/Liliput model at a good price a couple of years ago and realised this would give me an opportunity to model 62 015.
This was intended to be a 'fast' build; so no photos were taken during construction. Unfortunately I had a couple of problems with the finishing of the model, in part due to poor paint selection, accidentally removing all the inscriptions when preparing the model for painting, and the general awkwardness of trying to detail a die-cast zinc model. For which read 'blunt drills' and eighteen months build time...
I must admit that I still think the Bachmann/Liliput loco is the place to start. There are a few tricks to consider when detailing die cast models and as this technology becomes cheaper it's certain that more manufacturers will look to die-casting as a routine production method. For a start I'd invest in a decent, accurate and fast mini drill. I now have a Dremel Profi which uses collets rather than a chuck, so will happily hold a 0.35mm drill dead straight at about 15,000rpm. Bonus. It's a shame I didn't have it when I did the BR62...
Cutting or drilling zinc will require a lubricant on the cutting tool otherwise it'll wear and/or snag. Though any filing will need the part to be clean and lubricant-free. And don't under-estimate the use of a scalpel, with care they can be used as scrapers or cutters on even zinc.
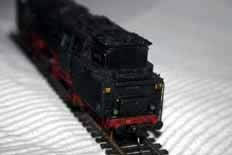
There are a lot of parts in this model. Many of them are specific to the model of 62 015; the sand-dome and bunker flare, for example, are home brewed to fit. Most of the plastic boiler fittings have been replaced with brass items from the Weinert range. In a couple of instances this has helped with the fidelity of the model, such as moving the steps on the side of the boiler.
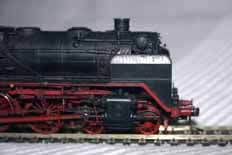
On the chassis there are also a few modifications. For a start the electrical connections have been simplified, I don't need operating headlights; let alone service lights or smoke generators. A Zimo MX61 DCC decoder has been fitted; this requires some care otherwise the two halves of the body can neatly cut the wires as the parts are 'made'. On the aesthetic front a couple of the valvegear parts were replaced with finer items from Weinert. The driving wheels have been turned to RP25 standards and the trailing wheels replaced. The wheel arches and splashers over the trailing wheels have been partially filled to reduce the huge amount of daylight in those areas.
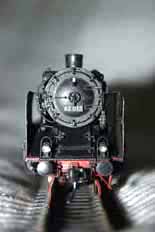
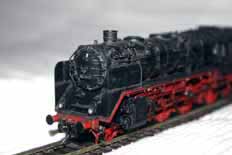
Around the front of the model there is a lot of brass! I replaced the smokebox door with one from the Weinert range and used a set of Günther smoke deflectors, bought long ago for just this eventuality. The smoke deflectors gained a full set of details on their inner surfaces; the rivet strip is from a Scale Link fret and the hinge is simply a piece of 0.3mm brass wire. Referring to the prototype for securely fixing the smoke deflectors has helped, but they're still a little delicate. Naturally the lamps and buffer-beam fittings have been replaced and Kadee couplings fitted.
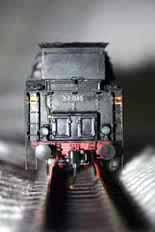
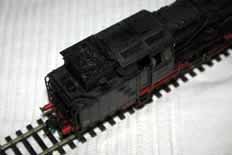
Theres a similar amount of work around the bunker. The bunker itself is plastic, modified to the one on 62 015 and fitted with a brass flare. The small fittings are all Weinert; handrail knobs, lamps, ladders, man hole covers, etc. Though I did manage to retain the original water filler hatch, adding only a brass handle to it.
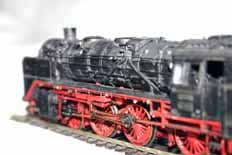
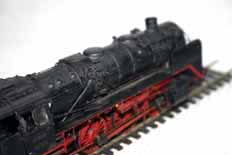
There is a load of more general detail work that has been carried out too. All the service light conduits and associated items have been replaced, as have the fittings on the cab roof. The boiler fittings alluded to earlier have needed a little modification to exactly fit the condition of the prototype, or to give them firm fixing on the model.
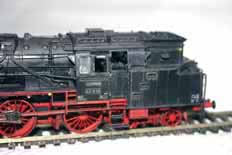
The final finishing has used Mo-Lak for the underframe red, thinned with Swan lighter fluid and brushed on. The black is my now-traditional Humbrol satin black. After the body was painted, Gaßner decals were applied and a set of etched 'plates specially ordered from VS Modellbau finished it off. The chassis was weathered before it was assembled; that way I could be certain that none of the weathering paint (Humbrol enamels by the way) got anywhere they shouldn't. The body was varnished with Future, carefully let down with a little Tamiya matting agent. Once that had fully hardened off the weathering progressed. In 1975 the loco was beginning to be used on railtours; despite being officially considered a steam boiler. So the loco was fairly hurriedly cleaned up in preparation for a run - this is the condition I've aimed for.


