Back to Contents
Back to Railways Page
Link to Sitemap
Messwagen
Riding Coach
One of the vehicles that became a 'must have' was a riding coach. This vehicle had been converted from a Prussian 12-wheeled restaurant car. Interesting huh? More details can be found on the Bahndienstfahrzeuge 'site here. I discussed this vehicle with a number of people; thankfully Tim remembered on his last trip to Thuringia, found the vehicle in question and took some pictures of it which are on his 'site.
So what's a riding coach? Well as you may have seen, steam locos were run after overhaul, but before a full repaint was done. The vehicles they hauled for these test runs were riding coaches. So-called because the workshop crews, inspectors or foremen rode in these vehicles during the test run(s) before signing the loco back into service. I assume that every loco works had one, so I had my excuse to build one. They seem to have been something of an East German speciality and were mostly converted from old coaches, fitted with basic interiors and small kitchen areas. I suppose that having a restuarant car to start off with must have made the conversion a bit easier...
Unfortunately not in model form though. There isn't a suitable starting point for this type of vehicle in HO so I had to do a little research and decide a suitable course of action. It emerges that the restaurant cars of this series were built on a very similar underframe to the sleeping cars built at a similar time. Result! Fleischmann do a very good sleeping car of the right style. But it's not on 6-wheel bogies. Nonetheless, Dave and I did a deal and I was the proud owner of a Fleischmann sleeping car. Now to hunt for some bogies.
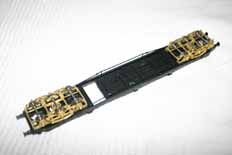
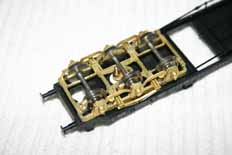
The interesting thing about the bogies is that although they're universally known as 'American' type; they don't actually match any bogie used in the USA. So I was stuck. So I looked on the British (00) market. Bigger at 4mm/ft rather than 3.5mm/ft; but no better in terms of style. Eventually I made a brave/foolish choice and decided to go with a set of Precision Scale Co. bogies Dave had no use for. Apart from anything else it gets the model built; and if a set of the correct style should surface then I'll retro-fit them. Pragmatism at it's best. Who says I'm a perfectionist? :-)
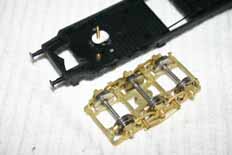
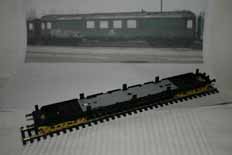
The bogie pivot requires moving on the chassis as the pivot isn't in the centre of the truck; the axle of the middle wheelset would get in the way. I've used a 12BA screw as a pivot - nice and simple. The bogie actually sits on the plasticard pad, shaped so that the weight is still carried through the centre of the bogie. To be fair the Precision Scale trucks are very nice bits of (a) kit. And they don't look at all out of place in this context, as the second picture shows.
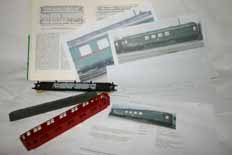
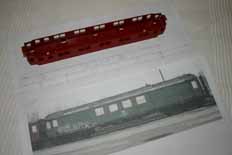
With the chassis rolling my attention turned to the body. So with the pictures downloaded from the 'net I started by scaling a drawing of the side of the coach. I'd already decided that I was going to replace as little as possible; so the vehicle retained its strength. This meant just replacing the window panel, down as far as the waist beading. One advantage of modelling this vehicle was that the re-panelling of the upper sides had meant that there was no beading around the windows. Whilst not a huge problem to fit, it would have meant that the conversion would have taken much longer to complete.
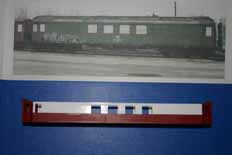
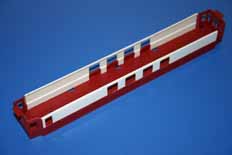
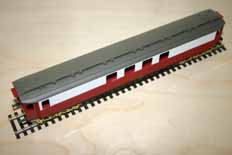
The side was cut from 30/1000" (0.75mm) styrene sheet 'plasticard'. There was a small strip of 10/1000" (0.25mm) along the bottom of the side on the inside. In this way the thickness of the side is correct at top and bottom, and makes allowance for the mould draft. The second picture shows how reinforcing was applied along the lower sides, inside the body, to give a firm fixing for the plasticard to the remains of the Fleischmann body. A reinforcing strip of 30/1000" was put along the top of the new side after fitting, this sticks up by about 0.5mm to engage under the roof.
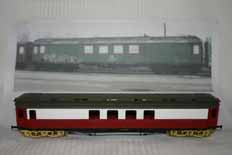
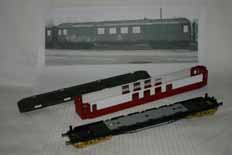
Coming along isn't it? Not bad for a couple of hours work on a Saturday afternoon. There are a few little jobs that need doing to the other parts of the coach now. I put 30/1000" reinforcing in front of the roof clips, this makes a snug fit with the 30/1000" strip along the top of the side. The three side clips on each side of the chassis were also removed, the body reinforcing prevents them fitting. And as the original glazing can't be re-used there's nothing for them to clip into anyway.
The end and door glazing sections will be re-used. This will also fix the roof, body and chassis together at the ends, in the vestibule area. But; it will need a screw through the middle of the assembled vehicle to hold the centre of the roof, body and chassis together. I've also got the underframe to detail and most of the detail on the roof needs to come off. The lower bodyside beading needs replacing too; but so far it's a start...


